Using Jeny’s Magic Cast On, cast on 20 stitches, 10 on each needle. Increase, using K1fb’s as you would for a normal sock toe until you have the desired width. Continue to knit straight, in the round, using your chosen fair-isle or intarsia patterns until the foot measures approximately 4.5 inches from the cast on. Knit across half of the stitches with waste yarn in a contrast colour, (this will be where you place your afterthought heel), then slip the stitches back to the start of your needle and continue working the leg of the stocking in the same way as the foot until you are happy with the length and add a few rows of ribbing in your chosen design. I used K1, P1 single rib. Add your heel. I worked my heel by working alternate stitches in red and green, but it would look good plain too. Decorate as required…I added pom-poms on skinny knitted icords, tied into a bow, a slightly thicker short icord sewn to the inner back to form a loop for hanging and then hand embroidered her name in a darker green which I embellished with red and green stitches on top, to resemble candy canes.
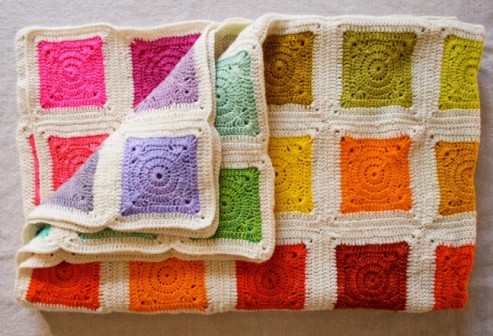
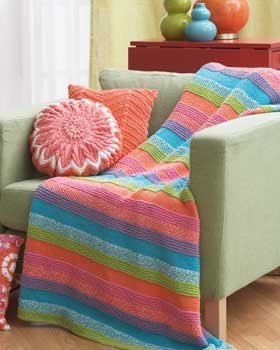
Afghans were both worked using 4.50 mm crochet hook and a mixture of Aran/Worsted and DK yarns. Granny square blanket was made using a join as you go method.
Just popping by to announce the launch of my latest knitting pattern.
Say hello to Miyu (beautiful moon) Hare.
Miyu is a lovely rag-doll in the form of a mystical and rather pretty hare. Named after the Japanese meaning for ‘beautiful moon’, she is bound to be loved by little (and not so little!) ones everywhere. Soft, floppy, but not too floppy, she is cosy to cuddle, the perfect size for small hands and will sit or lay flat. Her stylish laced boots, stripy tights and removable flared frock can all be made in the colours of your choosing to make your Miyu truly unique.
19 page detailed pattern includes dress and tiny flower. Available to purchase Here.
She is the first in a series of ‘raggy doll’ animals and I do hope you like her … ❤ x
As many of my regular followers already know, we recently welcomed a very precious and beautiful new addition into our family, and, as promised, here is the special gift I made to mark the occasion.
There is a whole world of hand knitted toy patterns available, but I must confess that very few actually have the qualities I like. I wanted to make something that had a certain ‘vintage’ quality about it and that would stand the test of time, something that would be suitable for a tot and still be loved enough as she grew and to not be confined to the bottom of a box. I also hoped it would be something that she would remember me by as the years inevitably pass.
After a long, long search, I happened across the delightful designs by Little Cotton Rabbits and was smitten! I knew that they encompassed everything I wished for and the only dilemma was which one to choose first! (I say ‘first’ because there is no way I will be able to resist adding to the collection…)
After much thought, I eventually chose ‘The Girl Fox in a Flowery Frock’. And here she is dressed in all her glory…
.The pattern is beautifully written, full of detailed instructions and picture tutorials, it is however, pretty labour intensive and a tad fiddly. Lots of sewing/seaming of tiny limbs, some intarsia and the stuffing is an art in itself! But, it is so worth it… The only ‘modifications’ I made, were to use a heavier weight yarn for the socks and pants, which I also couldn’t resist turning into frilly bloomers, and I added a few extra rows to the legs to make her a little bigger. The dress pattern is included but I did add my own motifs. She was a joy to make and I was really pleased with the outcome…can’t wait to get the time to make the next one!
Here is the gorgeous recipient … My first Grandchild, Elena (to be known as Ellie). To say I am besotted would be the biggest understatement ever … Oh, the joy of tiny things …..
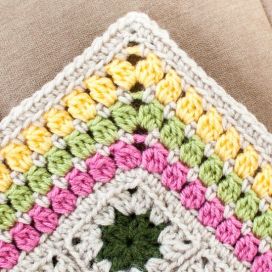
There are so many gorgeous things you can do with crocheted borders. They finish off knitted and crocheted blankets and throws beautifully, they sweetly trim cuffs and hems for adults and children alike, they edge flannel pillowcases and pretty up plain towels and tea towels.
Many European makers produce fabulous edgings, thankfully Google Translate is our friend… 😀
A pretty trim of petals. Free tutorial Here.Delicate lace edgings for handkerchiefs. Charted instructions Here.A colourful hem finishes off a granny square throw perfectly. Found Here.Great way of lengthening a skirt or dress, pretty way of getting extra wear out of children’s clothes too. Found Here.
Whether deep and gathered, narrow and simple, lacy, textured or plain, there is bound to be the perfect one for your project.
Pinterest is a great source of inspiration.
A couple of good boards you might like can be found, Here & Here.
No waffling today, just lots of pretty knitted borders to drool over. 🙂
Gorgeous lace. Chart Here.These lovely edgings would be perfect for blankets too. Instructions Here.Love this one and perfect for shawls too. Found Here.Sometimes a simple I-Cord bind off is sufficient. Tutorial Here.Deep and decorative without being too lacy. Free Pattern Here.Sweet and simple fringed edging. Here.Finally, this lovely blanket is knitted in one piece with the border included. Free pattern Here.
A pretty edge of bobbles. Can be sewn on or knitted on as you go. Found Here.
Trims, borders, edgings … whichever name you prefer there is no denying that most baby blankets and throws look so much better with the addition of one to give a professional finish.
Knitted blankets can be edged with a knitted or crocheted border.
Squidgy garter stitch blankets made special by the pretty leaf border. Free Pattern Here.
There are three different methods used for attaching a knitted border. They can be knitted separately (narrow edge upwards) and then sewn on. Stitches can be picked up along each separate edge and knitted in the round as one piece. Or, the border can be added, again working from the narrow edge, by picking up a stitch from the finished item one row at a time.
How to knit a sewn on border.
Carefully measure around the total edge of your blanket and add an extra 2 inches to allow for curving round the corners. This is approximately how long you will need to knit your chosen pattern.
Once you are almost at the desired length, and starting close to one of the corners (the end to end seaming will be less noticeable here), carefully pin the border around the blanket. Allow it to gather a little at the corners but ensure it lays nice and flat along the sides.
Many instructions tell you to measure the remaining length of border required, unpick all the pins and continue knitting. Personally, after spending all that time pinning and getting my border to lay ‘just right’, I take the rebellious route and finish knitting with the border attached … just be careful of the pins!!
Once completed, cast off. Pin the short length of border you just finished and sew in place using the Mattress Stitch method. (If you were a sensible yarner and unpinned, you will need to re-pin the whole border again first!)
Neatly sew the border ends together and weave in any tails.
How to work a border by picking up stitches.
Using a long circular needle pick up and knit stitches around the entire edge of the blanket. The usual rule is to pick up one stitch for each stitch along the top or bottom of the piece, and pick up three stitches for every four rows along the sides, but use your discretion for the best fit. Join work into the round and knit in your chosen pattern. NB: If not following a written pattern remember to increase one stitch at each corner, on every round as you work, so they lay flat. (Alternatively, increase two stitches on every other round, working one stitch either side of each corner).
Knit the border to the required depth and pattern. Cast off and weave in ends.
How to attach a knitted border one row at a time.
If making a narrow border, cast on the number of stitches required using your favoured method, if the border is wide, consider a provisional cast on for a neat finish.
Knit the first row of the pattern.
Knit the second row of the pattern and when you come to the last stitch in the row, knit it together with an edge stitch along the side of the finished blanket. (Have the right-side of the blanket uppermost and begin at the centre of one of the sides, not a corner).
Continue to knit the border pattern and on every right-side row, knit the last stitch together with the next edge stitch of the blanket.
Corners (If working a narrow border) *At the last stitch before the corner, on the right-side, knit a right-side row of the border, knitting the last stitch together with the edge stitch as before. Work a wrong side row. Repeat from *. Thus you are working two joining stitches into the same edge stitch. (If working a wide border, work three joining stitches into the same edge stitch). Work around the corner, making double or triple joins to achieve the effect you want. You may need to make alterations as you go to ensure the border lays flat or gathers in the way you want it to.
Once you have worked all around, cast off and either sew ends together neatly or join using Kitchener Stitch if you used a provisional cast on.
Borders can be deep and frilly, cabled, patterned or plain, used to provide coloured contrasts or made using a different texture entirely such as lace yarn or eyelash for a furry look. They can be made with eyelets to thread ribbon through, have fringing attached or just be a simple narrow trim of single crochet or garter stitch.
Left: Beautifully simple blanket in stocking stitch and edged with crochet shells in a contrast colour. Found Here (Etsy). Top Right: Pretty Ruffles to add in the round or sew on. Free tutorial Here. Bottom Right: Gorgeous baby blanket. Purchasable pattern Here.
The sky (and your imagination) is the only limit. And of course all these methods and pretty trims aren’t just for blankets.
There is far too much gorgeousness out there for the one post, so do look out for more pretty knitted borders soon.
Hexagons are the slightly more sophisticated cousin of the lovely square and can be utilised in pretty much the same way.
They can be knitted:
Knitted Hexagons. Purchasable pattern for this lovely blanket found Here.This beautiful knitted hexagon is for the more experienced maker. Pattern found Here.
And of course they can be crocheted:
There are almost as many crocheted hexagon patterns to choose from as there are squares. Perhaps one of the most recognisable is the African Flower motif, widely used by Heidi Bears designs.
Here I have used it in a pillow design. (I ‘wrapped’ the motifs around the inner pad when joining to avoid half motifs but you still get the impression that they are there).
Image by Wightstitches.
It’s closed stitch design means it makes an ideal blanket.
Joining hexagons: The motifs can be treated in a couple of ways, either join as you go as here …
Gorgeousness by the fab Lucy at Attic 24. Tutorial Here.
Or join them together individually by sewing or using a single crocheted seam.
Example of motifs seamed around with single crochet stitches. Pattern available to purchase, Here.Motifs simply joined together by sewing. Free pattern Here.
The main difference from squares is in the finishing of the outer edges.
Projects can be worked where full hexagons are used throughout and a staggered edge is formed. A narrow border is all that is needed to give a neat finish. Or half hexagons are used to fill in the spaces to ‘square’ off the piece and it can then be bordered in exactly the same way as a square or rectangular blanket.
An example of both of these methods can be seen in the first knitted version at the start of this post.
Other crocheted hexagon designs you might like to try.
A: Starflower Hexagon by Julie Mnemosyne. Free Pattern Here. B: Springtime Hexagon by Kim@eggbirddesigns. Free Pattern Here. C: Painted Daisy Hexagon by Megan Speakes. Free Pattern Here. D: Granny Square Hexagon Crystal by Paula Matos. Purchasable Pattern Here.
Whether you choose a plain knitted motif, a single coloured crocheted granny or a multi hued floral design; a baby blanket made up of hexagons is always a lovely project to work on.
And the results will be much admired too.
I do hope this has inspired you to have a go at your own masterpiece.
As usual, I rather underestimated the space required for this subject so my plans to explore the adding of borders will be next weeks theme instead.
Happy Yarning …🙂
Image Credits: Svetlana Gordon, Heidi Bears, Lucy of Attic 24, Anne Hay, Gina Clark, Melisa Joy, Megan Speakes, Julie Mnemosyne, Paula Matos, Lion Brand Yarns. Thank you.
As Sweet Sunday spins round once again, it is time for our weekly peek at a few Pinterest pretties. Rather than just ‘re-pin’ images, the original source is traced, so that the inspirational becomes useful rather than merely gorgeous to look at. Enjoy 🙂
Hopefully this has added a little colour & inspiration into your wintry weekend. Do leave a comment if there is a particular theme you would like explored.